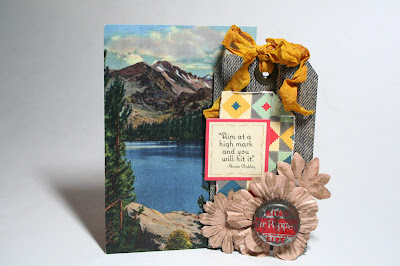
Muddy Flowers Tutorial
1. You will need two different shades of brownish paint/color mist. In this case I used October Afternoon's Sasparilla line - Saddle and Hitching Post. You will also need a big stack of white flowers (I always stock up with Michaels is having a sale!)
2. Spray your flowers in the lighter shade of mist on a nonstick craft sheet - these particular mists are nice because they give a nice even coat in one spray!
3. Dry the flower (but do not clean up the excess spray on the sheet yet!)
4. Spray a little bit of the darker shade of spray into the leftover lighter paint still on the sheet. (I think my sprayer was broken which is why the spray in the picture looks off) With your finger - mix the too colors so that you have a darker shade of the original color.
5. Using your finger apply the color in blotches to the flower - it will pick up really well on the ridges (if the flower has any) - and there you go muddy flowers!
6. Bonus tip - wondering how I attached the vintage bottle cap? I layered three pop dots (foam dots) on top of each other and then it sat flat on the tag!
Want to add a little vintage flair to your project? Check out the shop for vintage soda bottle caps and Colorado postcards!


3 comments:
Thanks for this tutorial Melissa! I have a stash of flowers that need some color. Great info and inspiration! Love your tag as usual!
great flowers -- thanks for the tutorial!
Great tutorial!I am always looking for boy embellishment ideas.
Post a Comment