Friday, August 9, 2013

What I'm Working On

At just about 6 weeks I'm starting to find a little bit of "free time".  Who would have thought it you put the baby down in their crib to nap they actually sleep and you have your hands free to do other stuff!  Today I started pulling some stuff together from the craft room to start working on some sort of Project Life/Baby Book hybrid project. So here is what is on my "work table" (and by work table I mean coffee table because my actual "work table" is a mess with Etsy stuff):

1.  A journal for writing down letters to Anna, stories, and notes of what we are doing during the day.  Hopefully to then transfer into a baby scrapbook.
2.  A huge stack of Studio Calico monthly project life kits.  I love these kits but haven't used any of them!  I am thinking of starting Project Life now (in the middle of the year) to document Anna's first year.
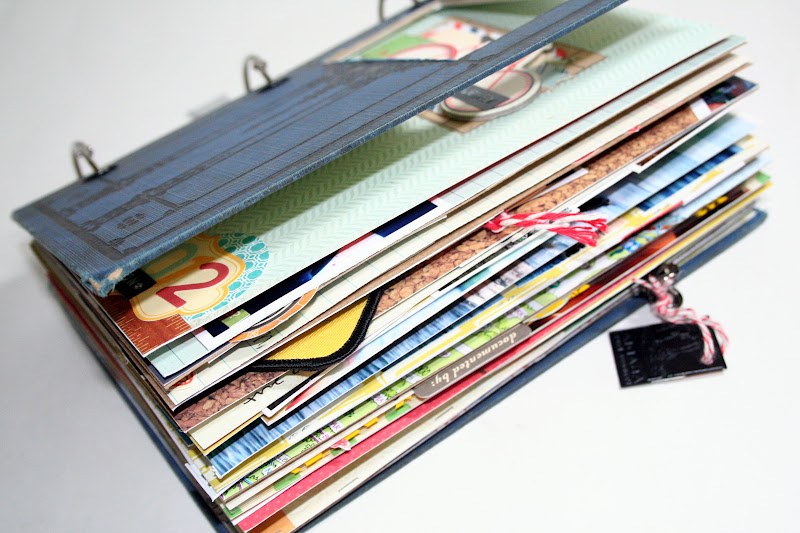
3.  A traditional baby book - you know just in case the Project Life thing doesn't pan out!
4.  The project life Baby Edition that I bought back in January and haven't started on!
5.  Project Life page protectors - so I can try to organize and plan out where my photos will go before I print them (so I don't end up printing all 700 photos I took last month and just print the ones I want to use in the book!)
6.  A baby monitor so I can hear when Anna wakes up.  Shhhhhhhhh......

And here is a cute picture we took last week of Anna (and Dustin) at 5 weeks old:


Photobucket

Wednesday, July 31, 2013

Meet Anna


Meet Anna.  She’s the reason I have been missing from the blog. 

Ok maybe that’s not exactly true; I mean Anna is only a month old so I guess I can’t exactly blame her for being gone for a whole year.  Truth is I needed a break – the last couple of years have been busy and stressful and creating and blogging was just one more thing I felt like I HAD to do.  Creating should be fun and if it’s not fun its time to take a break.   

I have thought about writing the “where have I been” blog post a million times over the past year and most of the time haven’t gotten past the first sentence. If you know me or have been following my blog you know I do this a lot:  I get really into something for a period of time then I just stop, and then eventually I decide I want to come back and write a “sorry I was gone but really I promise I’m back now” post.   This is why my blog is so perfectly named “Bursts of Creativity” because my creativity comes in bursts.  But its not just “creativity” that comes in bursts: I do this with all things:  bursts of Etsy, bursts of blogging, bursts of exercise, bursts of decorating, and so on.  Some bursts are longer (I threw myself into my etsy shop for a good two years before I started to get burned out) and some are short (yeah the exercise burst never seems to last more than a couple months). This is definitely a cycle for me -and it's genetic (thanks Dad!).

So I’m starting over.  This blog began as a place to share my latest crafts and little bits of my life with family and friends.  Then I got it in my head that I was going to be the “next big thing” in craft blogging (please read that with a little bit of humor and sarcasm) and the blog became about making things so that I could create tutorials so that I could get more followers.  I want to go back to simple – just sharing what is going on in my life.   So now the blog will be a place to share all of my bursts – whatever I am into at the time.  I do hope to get back into paper crafting.  Anna is going to need a baby book and I have a stack of Studio Calico Project Life month kits waiting to be used!  I also just hope to share stories of our life with Anna– those stories may only be interesting to her grandparents but I am hoping that I can get back to a place where this blog is fun for me – and if that means only 10 people are out there reading well then I am grateful that 10 people are interested enough to read this! 

Photobucket

Tuesday, July 31, 2012

Maine Travel Journal - The Video

My finished travel journal is HUGE!  I love it so much more than any other book I have every made - so I thought I would show it all to you in a video!  This is my first video so keep your expectations low! Hope you enjoy this better than just a few pictures!


And here are links to some of the posts/pages I referenced:
Bursts of Creativity Travel Journal Tips & Tricks - more ideas!
Bursts of Creativity Etsy Shop -for great vintage postcards!
Picasa - free photo editing software that I use to create collages
Vintage Postcard Travel Album - on A Beautiful Mess blog

Did you like this post?  Be sure to pin it!!

Photobucket

Monday, July 30, 2012

Maine Travel Journal

I planned on working on my journal while I was on vacation but I didn't get much done - so instead I spent the entire weekend (seriously probably like 10 hours) finishing the book up.  I LOVE it - but it is so huge it doesn't even close!  And I have the largest metal rings I could find - eek!  I only have a couple photos to share right now but am hoping to have more soon!

Photobucket

Monday, July 9, 2012

Maine Vacation


Just popping in to share a few photos from our vacation last week.  Enjoy!


Photobucket

Wednesday, June 27, 2012

Travel Cover Tutorial

We are leaving in a few days and all I have done so far on my travel journal is a cover.  But at least I have a tutorial for it!  I chose to work with a vintage book cover for this journal. Book lovers and librarians may want to turn away because I'm pretty sure this will make you cringe! 
 Tutorial:
  • Choose a vintage book with an interesting cover.  In this case I found one with a lot of great detail on it and a rectangle I could cut out.   Even if you can't find one with a place to cut out - you can always measure out a rectangle or keep it whole (some of the same steps will apply)When pulling a book apart for this first pull out the pages all in one bunch (and use them for some other crafts or include a few as pages in your journal).  The book cover will be in one piece at this point.  Cut the spine in half down the middle - you might be tempted to cut the spine piece down right near the bookboard but don't! (you will see why in a second)  Can't bear to tear up a vintage book?  Any book will do - try checking out the dollar store for cheap books - look under those paper dust jackets - sometimes you can find something really good!
  • Use an exacto knife to carefully cut out the rectangle
  • Turn the cover over - take the small piece of spine (you know the part you resisted cutting down!) Fold it over and glue it to the back of the cover (with a strong tape).  This will make the edge smooth (instead of seeing the chipboard and having frayed edges - unless of course you like that look!)
  • Cover the backside with a piece of patterned paper
  • Cut the rectangle out of the paper.  And there you go! 
And here's another idea for you:  try using a notebook as a cover for your journal.  I took a small lined notebook I had (this one was part of a set I bought at target a year ago) - pulled off the cover (which was a thicker paper cover) and glued it to a piece of chipboard to make it more stable.   The great thing about this idea is you can then use the pages too - because they are already the perfect size! I then mixed it up with patterned papers.

Did you like this post?  Make sure to pin it! 


Photobucket

Tuesday, June 26, 2012

Travel Journal Tips and Tricks

 One of my favorite projects to work on are travel journals.  Sometimes I contemplate taking a weekend trip just so I can put one of these books together!  I've come up with a few of my tips to share - this post is very photo heavy but I wanted you to get a glimpse of some of my journals.  Hope you enjoy and feel free to share some of your ideas in the comments!

Travel Journal Tips & Tricks:

 
  • Put the book together BEFORE you go!  Ok this is sort of implied in the fact that is a travel journal rather than a vacation mini book (which I imagine being something you create after to show off all those pictures).  I have a basic formula for how I put together my travel journals that make them super easy to fill out as I go.  For each day I am going to be gone I make the following: a page that has a pocket (for brochures, maps, business cards, tickets, and whatever else I pick up during the day), a page that is either white or kraft for writing on (which I usually jazz up by stamping/misting), and a page of cardstock or patterned paper for adding photos to later.  I make a couple extra of each of the pages and bring them along just in case I feel like writing more or need more space.
  • Think about size - 4x6 and 5x7 books are great because you can take them with you in your purse and make notes as the day goes on.  Its also a lot less daunting to look at a small sheet of paper and have to fill out journaling for the day than a larger page.
  • Ring bind your book.  Rings are great because you can bring a hole punch with you and add lots of things as you go.  You can get cheap rings in lots of sizes at your local office supply store.
  • Include postcards as pages.  Vintage (like the ones from my Etsy shop) or new - postcards are perfect pages.  Alternate between writing and photos on the back.  Another cute idea that I saw somewhere a few years back was as your trip goes on fill out postcards and mail them to yourself.  When you get home you have all these great memories waiting for you (with stamps and postmarks) - then add them to your book. 
  • Let your photos be a page!  Try gluing two 4x6 photos together and punching holes in them letting them be a page in your journal.  By gluing them together you create a quick and sturdy page.  I usually alternate between these and cardstock pages – it allows me to include more photos without feeling like I have to make more scrapbook “fancy” pages.   
 
  • Spend a little time every night to write in the journal.  If you don't make time every day you are likely to forget what happened and may end up never going back to fill it in.  Even if its just small stuff - like where you ate - you will be happier with the results at the end of your trip when your book is bursting - full of pages and journaling! 
  • Get others in on the action!  Have each of your children (or your husband) create a page – include a photo of them and have them right down their favorite moments from the trip.  I get my husband to fill out something each day – sometimes it’s a small journaling card and sometimes it’s a whole page – its usually really random and strange but at least he’s involved and the book is a reflection of both our points of view!
  • Stop at the gift shop!  This is one of my favorite parts (because it involves shopping!) - going to the gift shop to look for little things to include.  They don't have to be expensive - often the cheaper items are the best!  Look for stickers, patches, pins, and more! 
  • Use a map or brochure as a page.  Try gluing it to another piece of map or cardstock to make it more stable.  Here's a tip: if you go to the state's tourism website that you are visiting you can usually order a map and travel guide (for free!) I use those to help me find fun places to check out and then I use pieces to include in my journal (and you're recycling!)
  • Sometimes I add photos as I go - if you are having a laid back vacation and have some downtime have some photos printed and add them in.  Splitting the work up will make things easier when you are home.  Having a huge stack of photos to fit in can sometimes feel daunting. 
  • Photo editing software is your friend!  I use Picasa – its free and super easy to use.  My favorite function of the software is that it allows me to create photo collages.  This is great for small (5x7 or 4x6 size books) – take only two photos and create a photo collage – have it printed at your local photo printer and now you have two photos for the price of one and the smaller sizes lets you include more photos in your book.
  • Don't throw away anything! Be creative and find ways to include all those paper bits we accumulate through the day - receipts, fortunes, business cards, menus etc.
  • Document a playlist.  If you are on a road trip you are bound to hear the same songs again and again.  I like to take photos of my XM radio with the songs that we heard a lot.  Sometimes they are songs I like a lot and sometimes they are songs that made me cringe every time they came on.  It's fun looking back and seeing what was on the radio at that point in time.  Don't listen to the radio?  What CDs were you're favorites at the time - make a page to document it!
  •  My absolute FAVORITE part of my travel journals are the bits hanging off the rings.  When I'm on a trip I am always on the look out for small items I can bunch a hole through and put on my book.  To do this you need a good hole punch.  I use the crop-a-dile because it punches through everything - cardboard, metal, plastic, and paper.  I also stock up on jewelery rings and hooks - these are great for making sure the items swing freely.  Some things I have included in the past include: keychains, price tags, bottle caps, items from the 50 cent machines at restaurants ( that's where the little green heart keychain came from in the picture).  My favorite are those flat pennies.  You know  the ones I'm talking about - almost every tourist trap/attraction has them - and every time you see it you think - what in the world would I do with a flat penny?!?! Well punch a hole in it and add in to your book!
  • Make it stick out - I like my journals messy looking - I'm always gluing things a little off the side of the page.

Check out my latest travel journal - with a video - for more tips!

Did you like this post?  Make sure to Pin it!  


Photobucket