 Supplies: I used distress ink in the colors of vintage photo, tea dye, and walnut. You can do this technique using any combo of distress ink - I chose browns because I wanted a vintage distressed tag. You will also need a mini mister (or spray bottle of some sort) and a nonstick craft mat (like the one I am using from Ranger). And finally you will need a tag!
  First thing take your distress inks and smudge them onto your craft mat to transfer the ink to the mat. I put mine all near each other but not overlapping (you don't want to transfer one ink color onto another pad).
 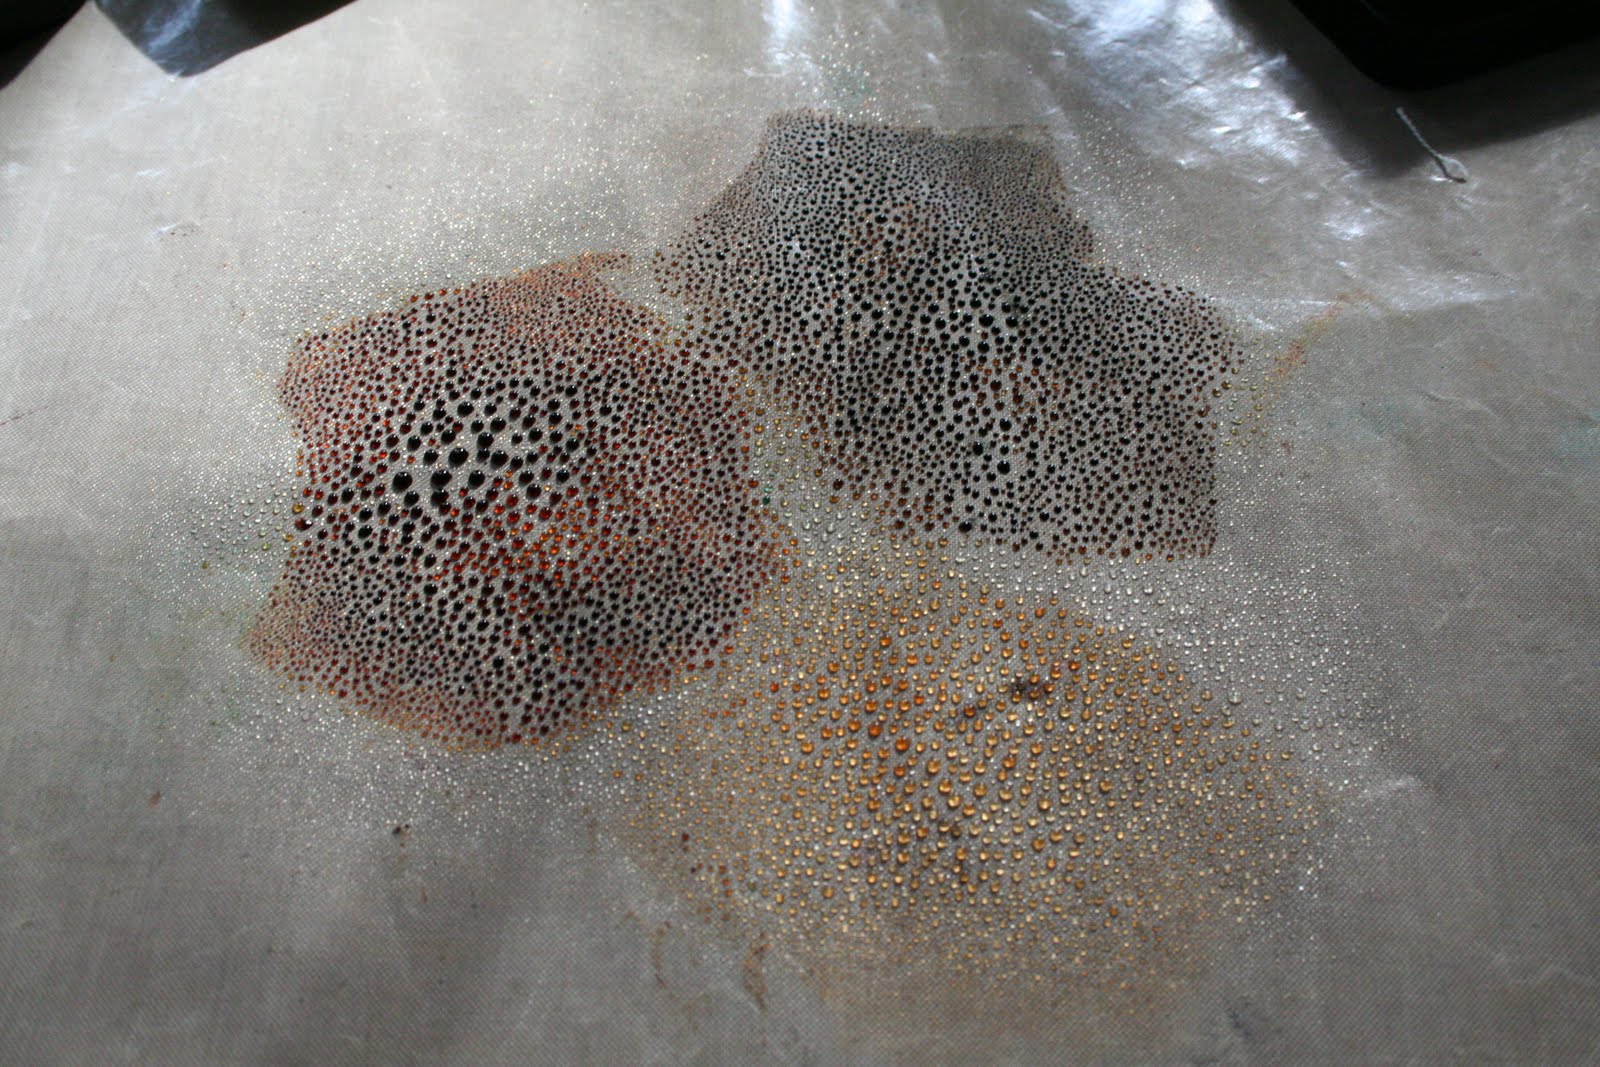 Spray the ink to form water droplets - you want smallish water droplets so that you get a variety of color - if you get large droplets they may all blend together and you will get one new color.
  Take your tag and dab it into the ink
 It will look like this. Take it and dab it until you have the whole thing covered - the colors will blend a bit - that's ok
 Here is what it will look like when you are about done. See the huge splotches of color on the mat? You want to avoid those and try to pick up the smaller spots.
  Dry the tag. It WILL curl up - don't freak out! Keep the heat on it and will flatten back out on its own!
 Then you are left with something that looks like this - there are definitely different colors in there but you don't see spots - yet.
 Take the tag and dab it back into some of those spots that are left. Let it dry.
 I then took vintage photo distress ink and blended it into the tag with a blending tool.
 In the end you are left with a tag that looks like this!
 Then add it to a layout like I did in yesterday's post. Or you can decorate it like I did in this post or you can see what I did with this particular tag by coming back tomorrow!
If this is your first time to my blog - Welcome! I would love for you to become a follower of my blog or my facebook page!(see link on right side of my blog!)
This post is linked at Sumo's Sweet Stuff and here:


8 comments:
thanks for the tutorial--i love that technique
That is so awesome! Thanks for the tutorial.
Wonderful tutorial, Melissa! Loved how they turned out! I'm saving this one for a future project! :)
xoxo laurie
This tutorial makes the tags look like the real deal! Fab tutorial and I'm happy to feature you on SNS #65's sidebar this weekend. :)
Donna
http://funkyjunkinteriors.blogspot.com/
A very nice tutorial. And such a nice display of your 'putting it all together'. I have got to get me some of this distressed ink. Really love your stuff!
I've tried distressing tags with no success, but you make it look so easy - I will definitely be trying this!
great technique. much easier than some other others I have seen!
Love this tutorial! I tried it with lovely success....I posted my finished product on my blog and linked back to you! :) If you want to check it out, here's the link....
Post a Comment