

Like this post? You should Pin It

 I found this frame the other day at a craft store while looking for a new project for the blog. I liked the detail and the fact that it was 3x2 (almost ATC size - and actually the frame lied it was more like 3 1/4 x 2 1/4 so even closer!). I thought this was the perfect project - I could rotate the ATCs in the frame depending on what was going on during the year. So first up is a Valentine's Day design:
 I hope you enjoyed the snow village yesterday. Today I am going to show you how I made the houses. Because the tutorial is very photo heavy I had to group them together. To see more detail click on the images to make them bigger. Supplies needed: a variety of patterned paper and embellishments, adhesive, circle punches, trimmer and a ruler.
  First measure the height of the box and cut your paper to that measurement x 12. Put your adhesive on the box and wrap your paper around the box - for the smaller box I was able to wrap the paper around 3 sides - for the larger ones I had to use two pieces to wrap around 3 sides.
  Cut a piece to fit the front in a different patterned paper and adhere. Sand down the sides if needed.
  Take the top of the box and trace the triangle onto a coordinating piece of patterned paper. Cut out and adhere. Sand down as needed.
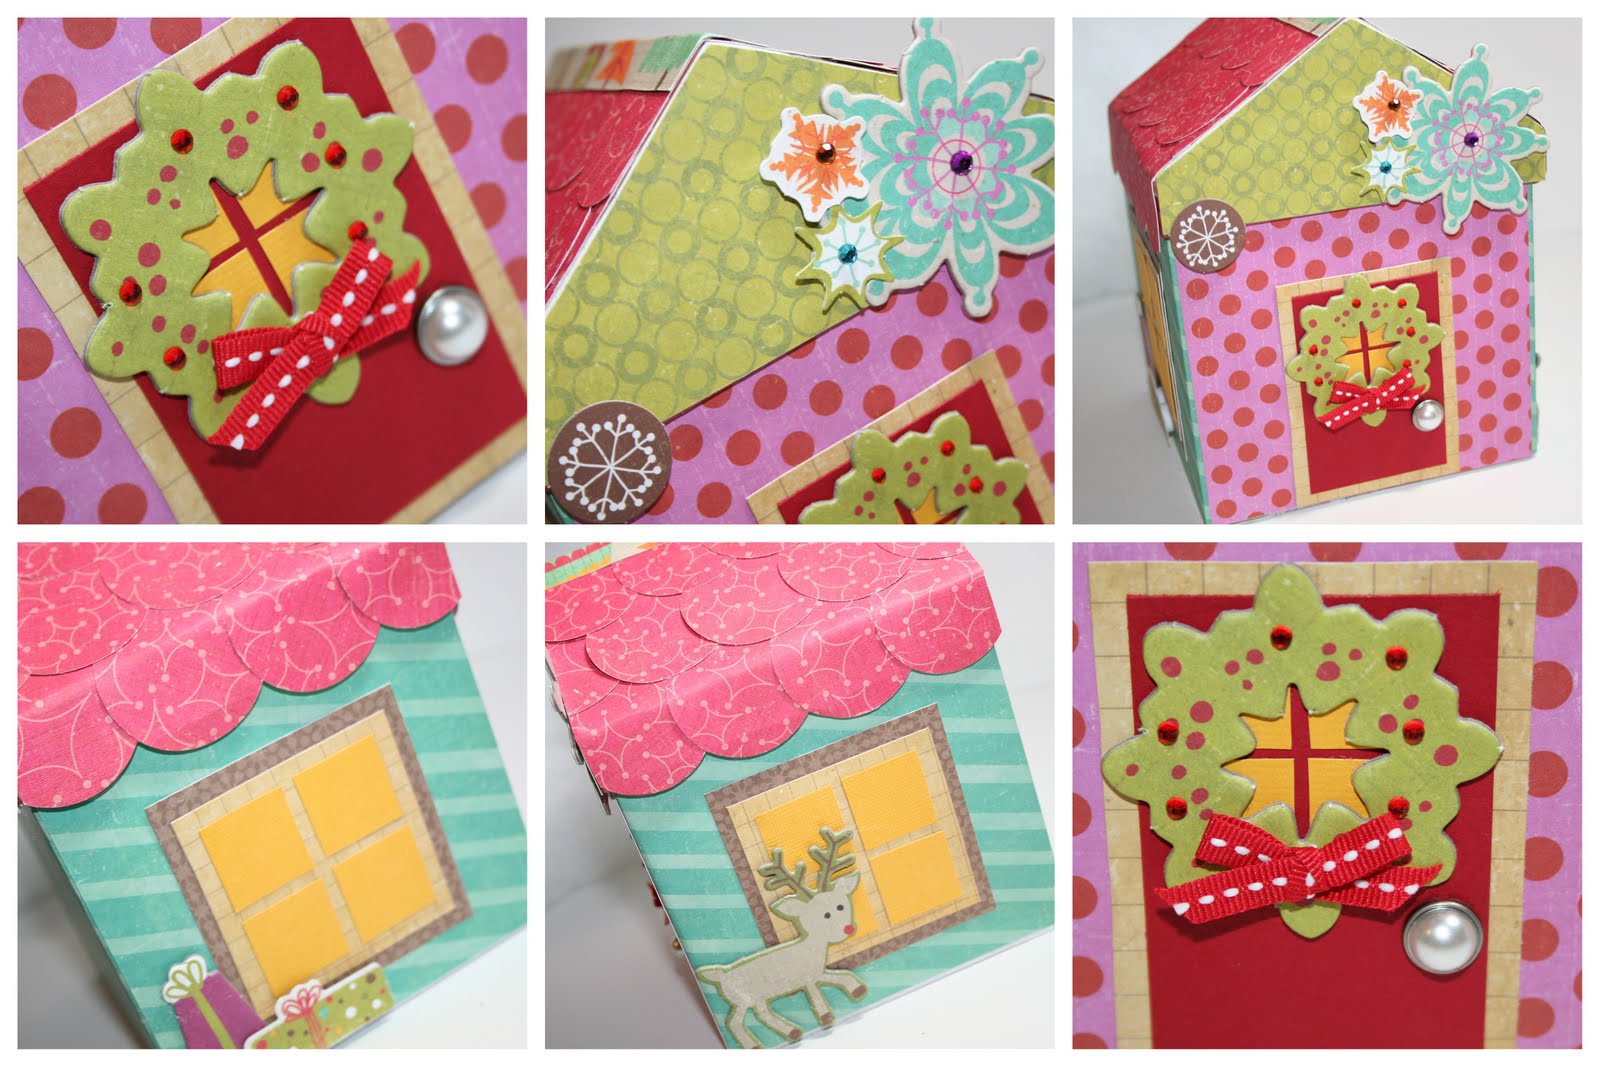
  Using a circle punch cut a bunch of circles out. I used 1" circles for my smaller house and larger circles for the larger houses. Using scor tape I adhered the tape to the roof first and then put the circles on top of it.
  Once you have the circles all glued to one side, flip the roof over cut the overhanging bits off. Adhere circles to the other side and repeat. Cut a strip roughly 3/4" and fold in half. Adhere to the top of the roof.
  Cut squares like shown in the picture and layer on top of each other to make the windows (and door). The sizes will vary depending on the size of your house.
 Embellish the houses. I used a variety of die cuts, chipboard shapes, and rhinestones. Remember to cover the back of any piece of self adhesive chipboard (or sticker) that is sticking off the side of your house with baby powder. The baby powder makes the sticker "unsticky" so it will pick up dirt or other things. I used the same process for all of my houses. Hope you enjoyed the tutorial and if you didn't see yesterday's post make sure to check it out for more detailed photos of the other houses!
 This post is linked at Passionately Artistic , Tidy Mom and here:


 I created this little snow village using Crate Paper's Snow Day collection and a couple house shaped boxes I found at the Dollar Tree! I'm totally loving it and I have a couple of tutorials I am working on for the next couple of days. Be sure to become a follower if you aren't already!

 This post is linked at Passionately Artistic and Tales from Bloggeritaville and here:


 And if you want to keep watching the blog to see what I make - make sure to become a follower or a facebook fan (check out the right side of my blog)


 I just love these Cosmo Cricket chipboard shapes! And I'm not just saying that because they posted one of my tags on their blog!
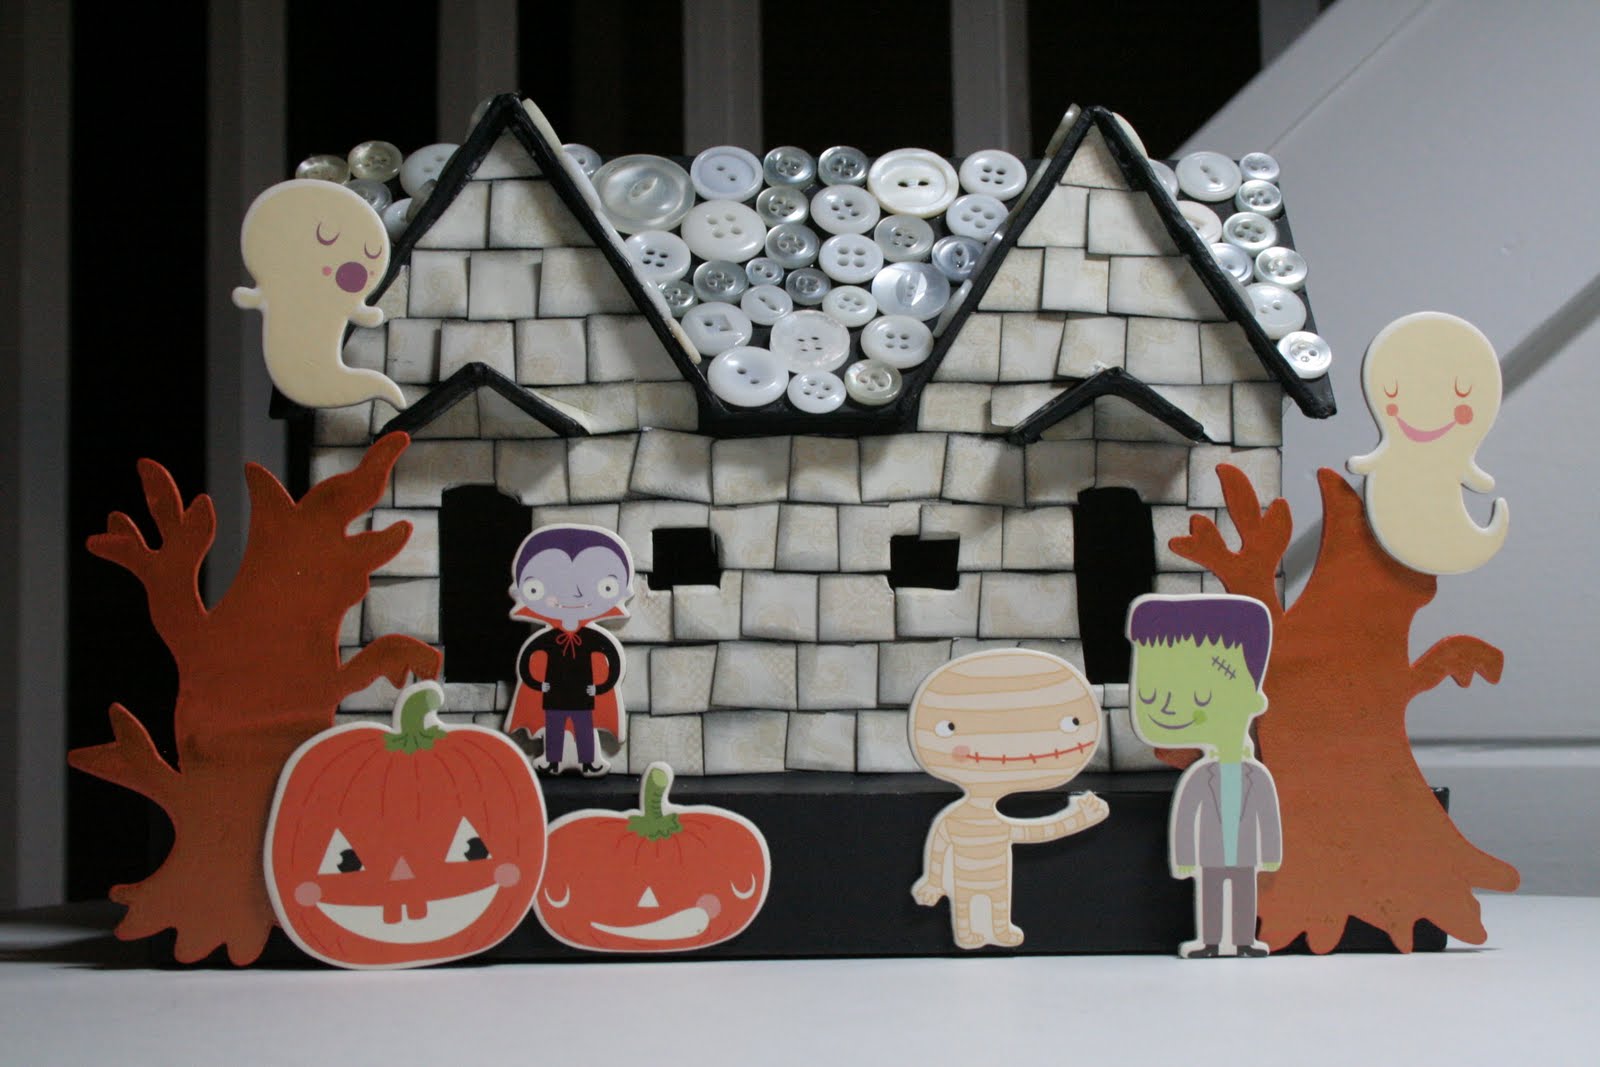
 I didn't do a tutorial for this house but just to give a run down on what I did - I painted the entire house black first (yes I finally went out and bought black craft paint!) I then covered the roof in white vintage buttons - this took me HOURS - seriously way too long! (side note - I used glossy accents to adhere the buttons - this stuff is an amazing adhesive!). I then cut out strips of paper - cut into rectangles - inked each piece and adhered them to the front of the house -
 YES those are tiny rectangles of paper - and YES I am crazy because that took HOURS as well! I then added the trees (which i found on clearance at a local craft store) and the Cosmo Cricket chipboard pieces and there you have it!
 This post is linked up at Blue Cricket Design and :


 So here it is - the tutorial for the Halloween Birdhouse. Think about all the possibilities for these little wooden pieces - you could turn it into a Christmas house or you could make it a shabby chic cottage with lots of flowers! Anything's possible!
 Supplies:
 Paint the edges the birdhouse with black paint (you only need to paint the parts that will show) Unfortunately I didn't have black paint (who doesn't have black paint??) So instead of driving the half mile to the local craft store I decided to paint it with black soot distress reinker. Which totally worked - until I wanted it to be dry - and it wasn't drying - but I had this brilliant idea to seal it with mod podge and hoped that would make it so I could handle it - and it totally worked! But it would have been SOOO much easier with acrylic paint!
 2 Use tracing paper to trace the sides of the birdhouse. Use the patterns to trace and cut out your sides from patterned paper (i picked different patterns for the top, sides, and back and front) And I totally learned to use tracing paper from Melissa Samuels - genius!
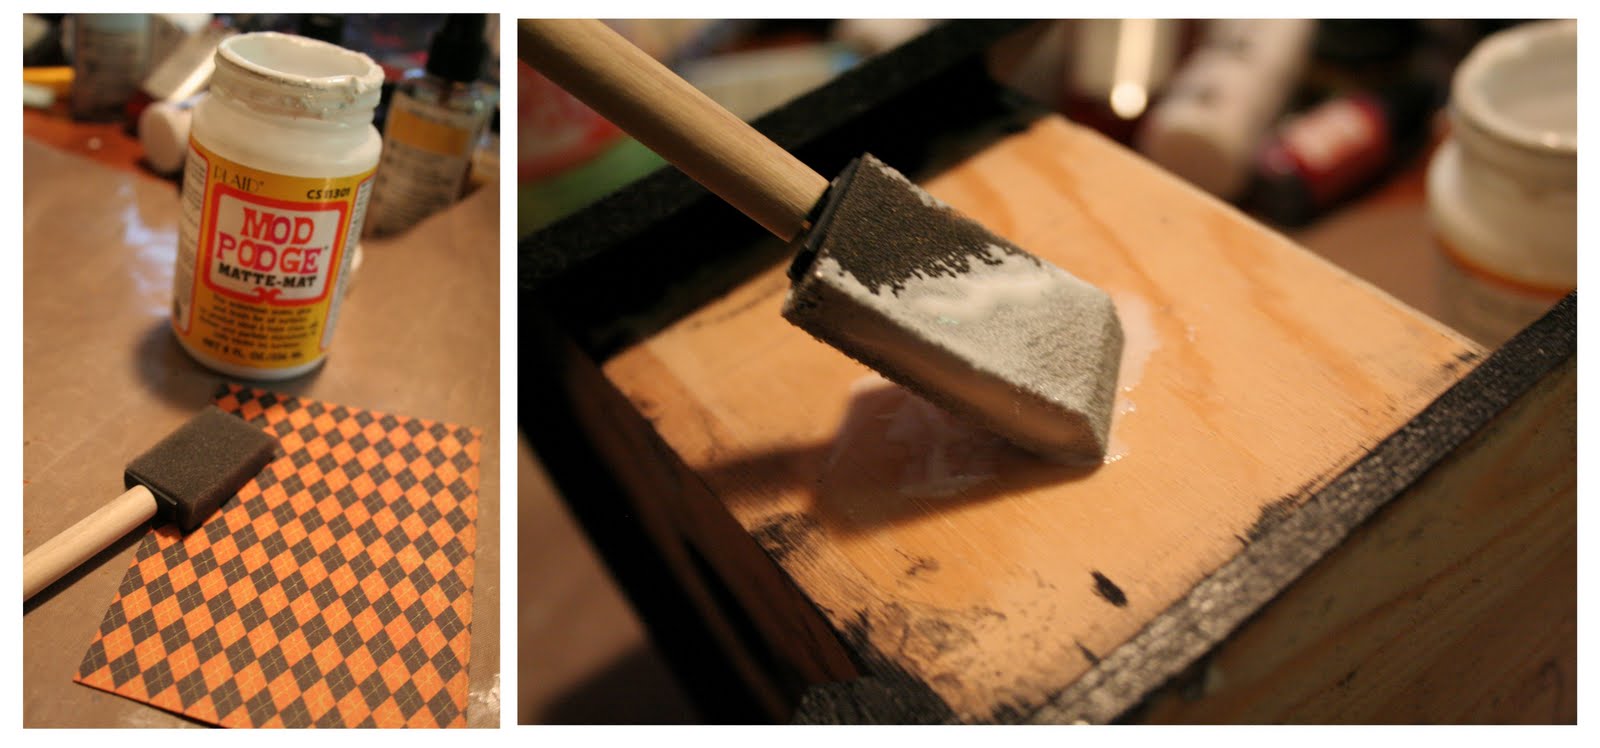 Use mod podge to adhere your pieces to the birdhouse ( I apply the mod podge to the wood)
 Sand down the corners to make sure the papers are flush with the sides of the house. You could ink the sides at this point (I planned on it... but I forgot...oops!)
 Apply mod podge to the outside of the birdhouse to seal it - it also gives a really cool texture.
 Now comes the embellishing! Instead of cutting the birdhouse hole out of the paper I punched a 2" circle out of black cardstock and glued it to the front - made my life SO much easier! (helpful tip - when using punches flip the punch over (like pictured) so you can see where you are punching - much more relevant when punching patterned papers)
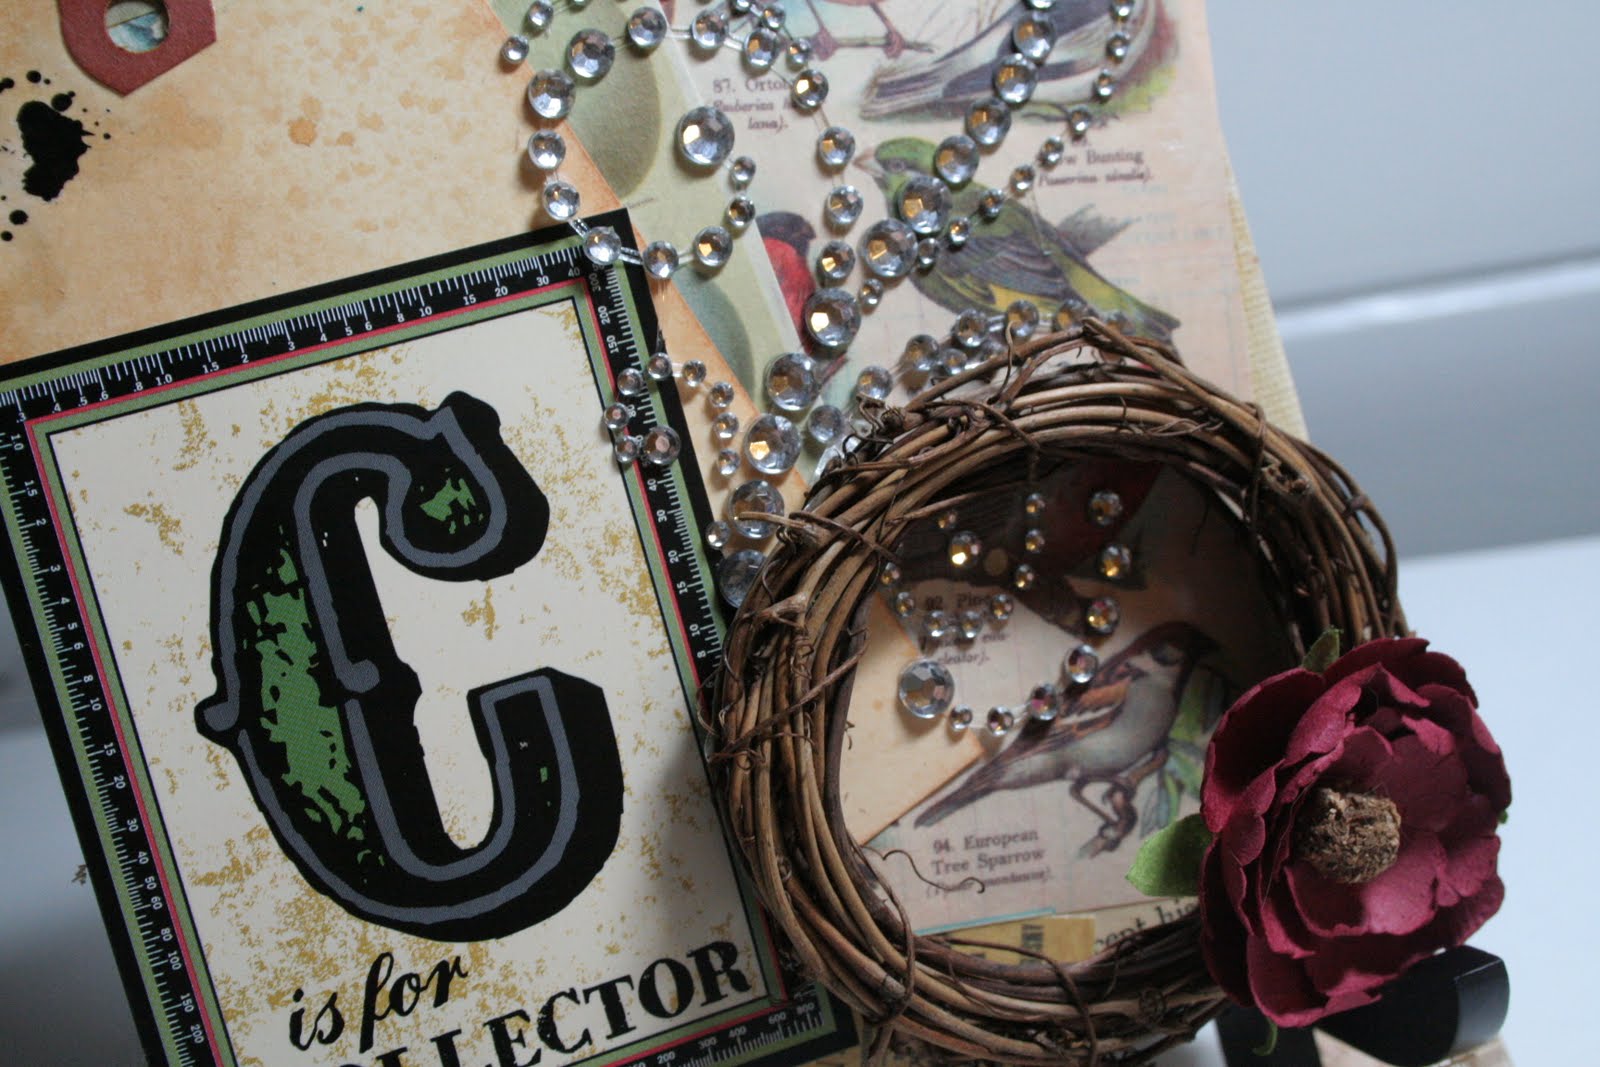
 I used the coordinating stamp set and stamped a punch of tree images. I then used my distress inks to watercolor them. To do this I picked a couple colors I liked (spiced marmalade and peeled paint) and wiped the ink pad on the craft mat. Then taking watercolor paint brushes (they have water in them - when you squeeze them the water comes out) I added a little bit of water and painted the ink on. When I was done I cut the images out. (tip - I use ranger archival ink to stamp the image - it's waterproof so it won't bleed when you paint the distress ink on - staz on would have worked as well but I LOVE archival ink)
 I embellished the rest of the house by cutting images out of the patterned paper and adhering to the house. To get the trees in the front yard to stand up I left an extra piece at the bottom to fold over so it would stand up.


